How to create a contact group
In Reago, you can work with your contacts not only at the segment level, but also at the group level.
Think of groups as a static list of contacts that does not change over time. In contrast, segments are a dynamic list of contacts and can continuously expand according to the criteria you set within the filter.
Groups are suitable for those cases when you need to send newsletters or SMS messages to the same contacts over and over again.
How to create a group?
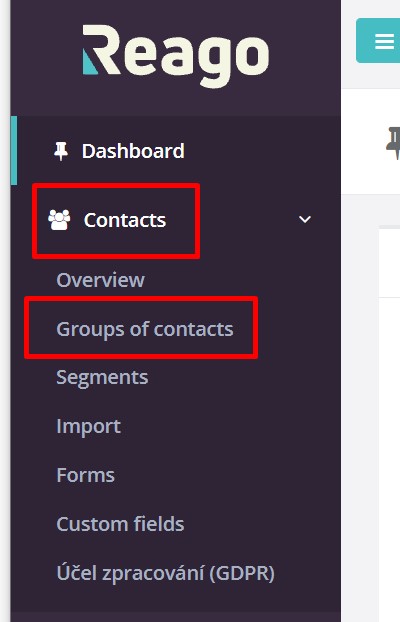
In the vertical menu, click on the Contacts and then Groups of contacts.
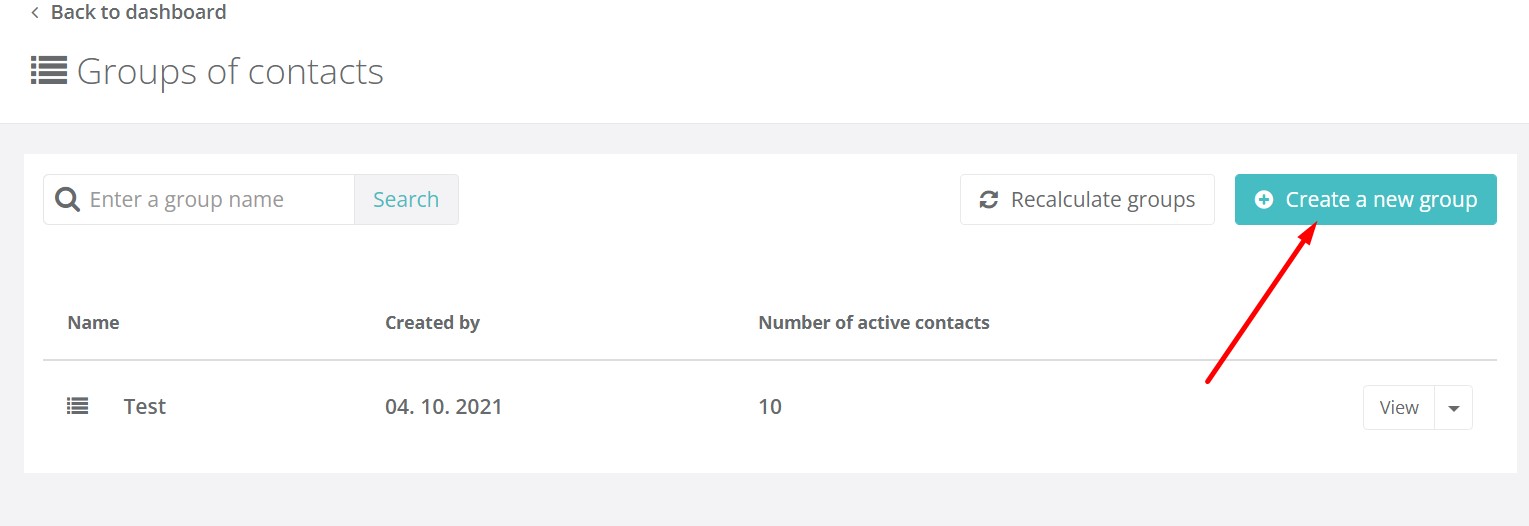
Then click Create new group.
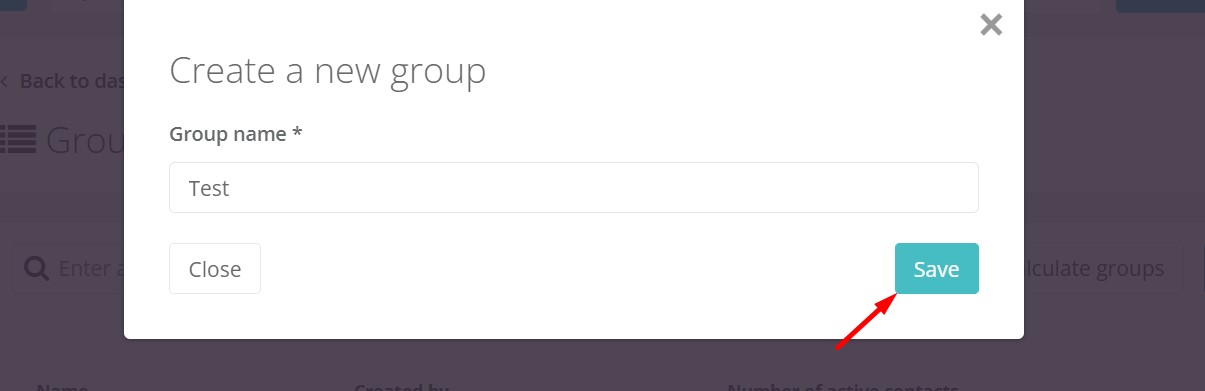
Name the group and click Save.
You will then see the newly created group in the list. You can continue working with this group according to the available functions, which are located on the right side in the place of the button. You can view the contacts in the group, you can import or export contacts to or from the group, and you can also delete the group.
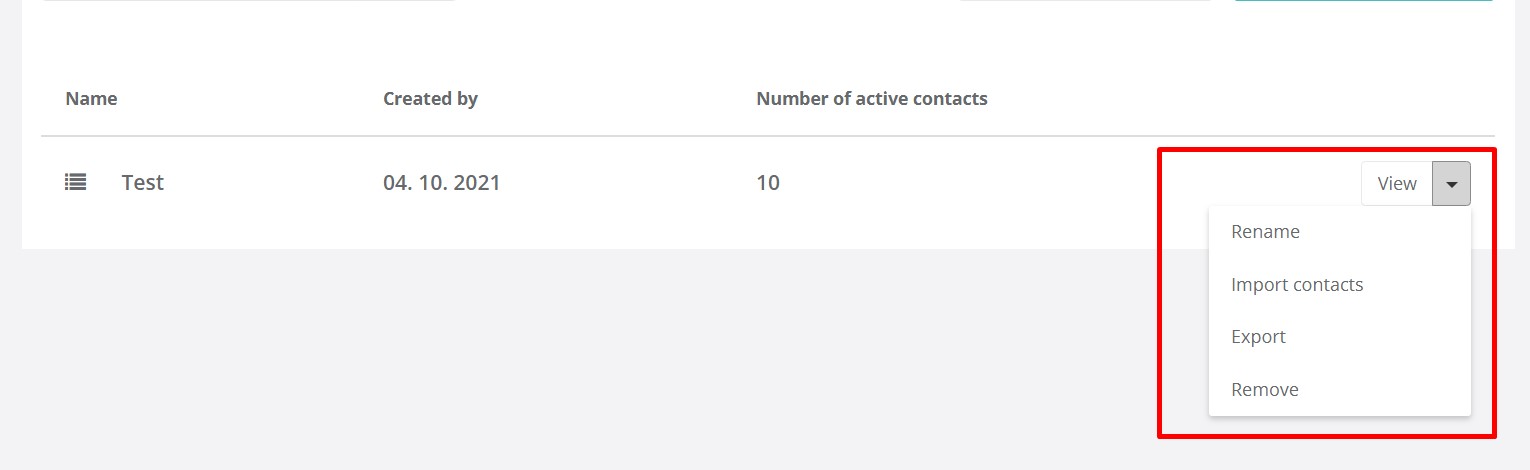
If you delete a group, you don't have to worry about your Reago contacts being deleted as well. The contacts will remain in Reag, but they will no longer be placed in this group.
How do I add contacts to a group?
Go back to Contacts -> Overview.
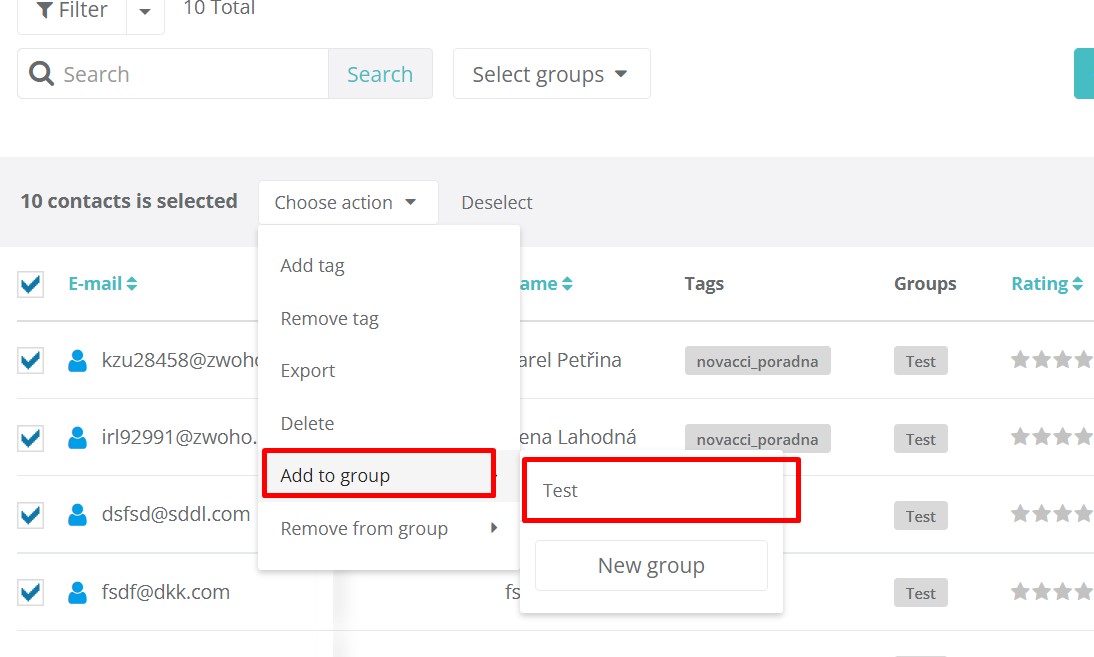
In the contact list, select the contacts you want to add to the group.
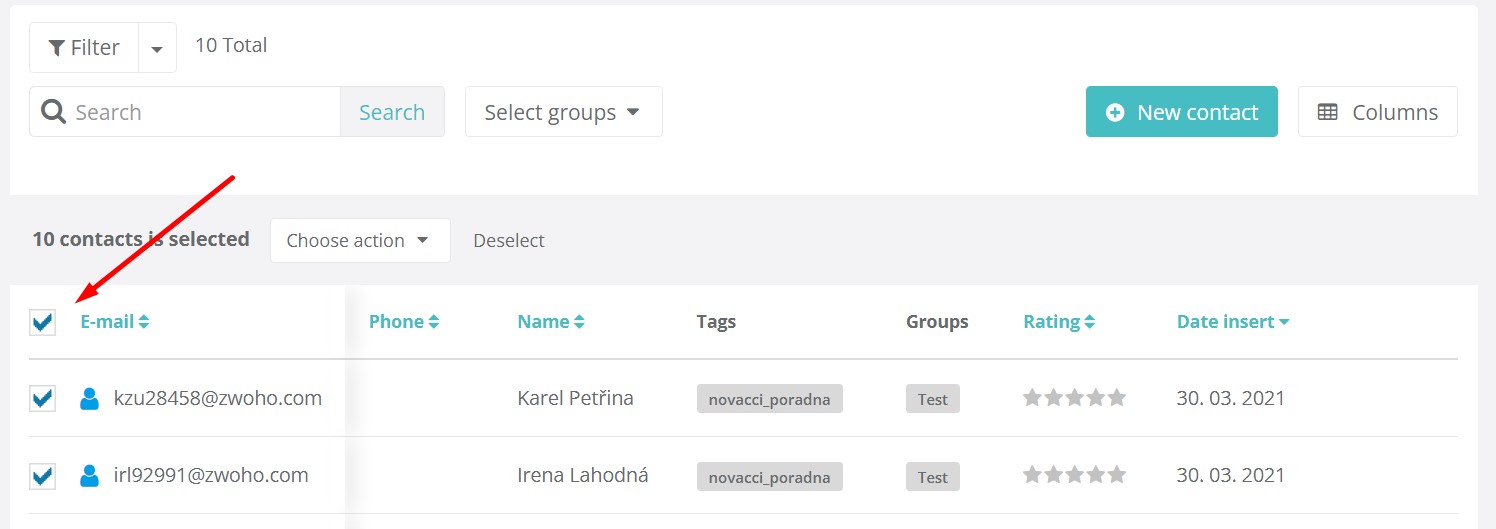
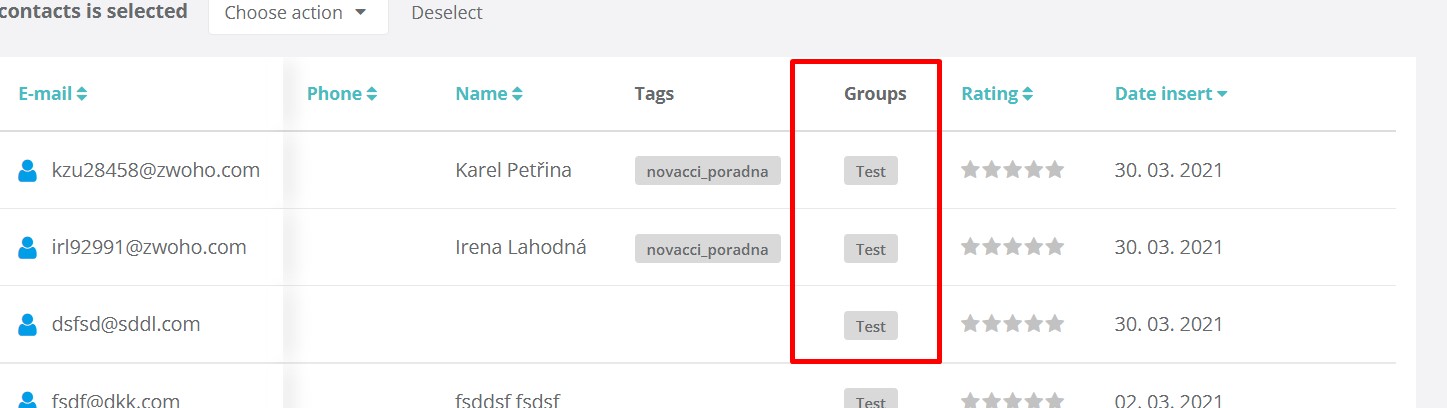
And then select the Add to group action, and then select the group you created to which the contacts will be assigned.
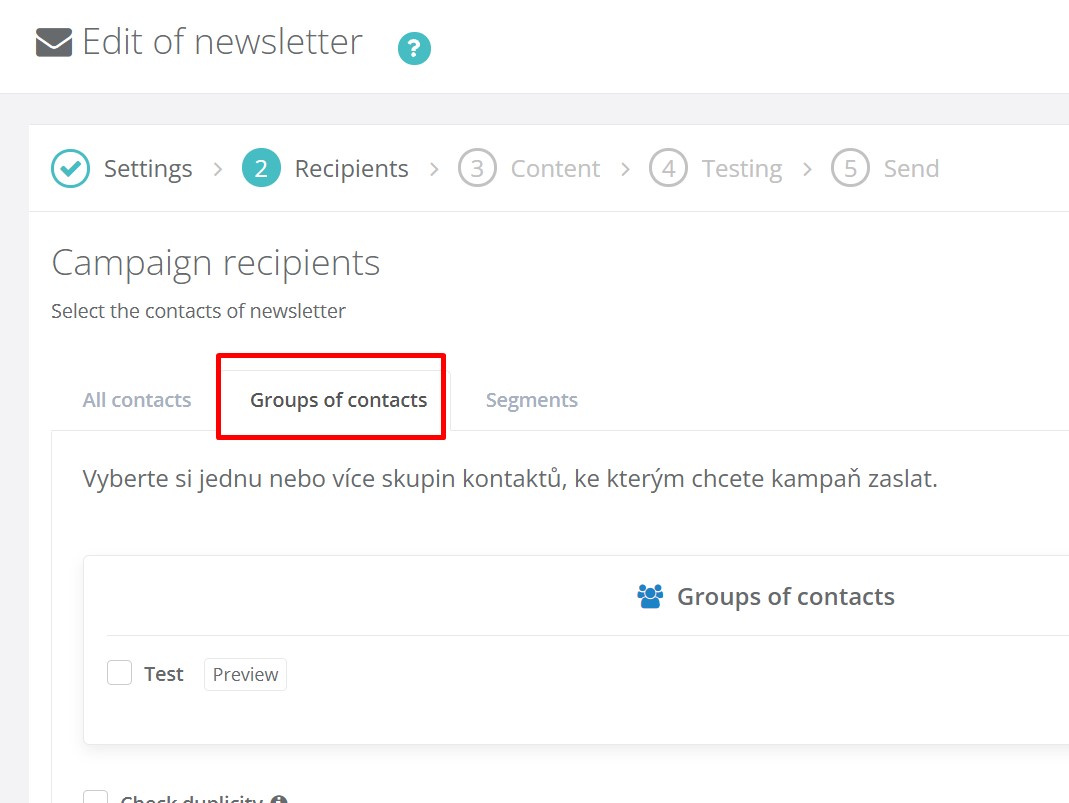
You can then send prepared newsletters or SMS messages to the group you have created in your campaigns. You can find the created groups in the second step of creating a campaign in the Contact Groups tab.